
Trick To Add Followers Gadget in Blogger
Hello Friends,You know that Google decided to retire most of Google Friend Connect's feature Few years Ago, though they have mentioned that they will continue to run the service for the 'foreseeable future'. The GFC Follower's gadget, that used to be available in the 'Add a Gadget' list of gadgets, has now been replaced with Google+ Followers gadget. For those of you who are still using GFC's Followers gadget, you can keep using it, until Google decides to pull the plug. But for new users, or for those of you who had your gadget accidentally removed, here's how you can add it back.

Step 1:
Go to Dashboard - Layout

Step 2: Add a Gadget (where you want the gadget to appear)


URL looks like this: http://www.blogger.com/rearrange?blogID=8584910072934601618§ionId=sidebar-right-1&action=editWidget&widgetType=HTML&referrer=directory
 |
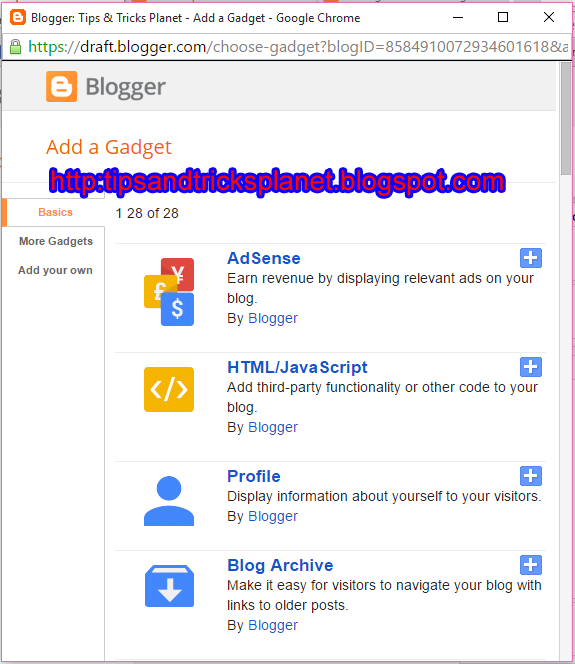
| Click On The Image To See Full Size |
 |
| Click On The Image To See Full Size |
http://www.blogger.com/rearrange?blogID=8584910072934601618§ionId=sidebar-right-1&action=editWidget&widgetType=Followers&referrer=directory
Step 7: Copy this modified URL, and paste into your browser (preferably the browser that you were using early on, the on that is logged into your Blogger account). Hit 'Enter' on your keyboard, and your Followers gadget is back.


http://www.blogger.com/rearrange?blogID=8584910072934601618§ionId=sidebar-right-1&action=editWidget&widgetType=Followers&referrer=directory
 |
| Click On The Image To See Original Size |
Stay Connected For Lots More.
No comments:
Post a Comment